
How to vacuum seal your products?
First Off, What Is Vacuum Sealing?
For those who have yet to hear about the wondrous world of vacuum sealing your food, let’s get into the initial nitty gritty. Vacuum sealing, or packaging your produce in an airless environment with the help of vacuum bags and sealers is one of the best ways you can extend the shelf life of your food. What was once a fancy gadget that you’d only find at high end restaurants is now an affordable kitchen appliance that more and more people are investing in in recent times. When it comes to purchasing a vacuum sealer for your own home kitchen, it is wise to note that there are 2 different kinds you can choose from. For those who have limited kitchen space, you’ll probably want to look into getting a handheld vacuum sealer which won’t take up too much counter space and can be easily stored in a drawer/cupboard. For those who are looking to nurture their inner Masterchef, you may want to look into the other option of a larger counter top unit which will do the job a lot quicker. Now that you know a little about vacuum sealers, it’s time to look at how you can go about vacuum packaging your fruits and veggies at home!
Prepping Your Veggies
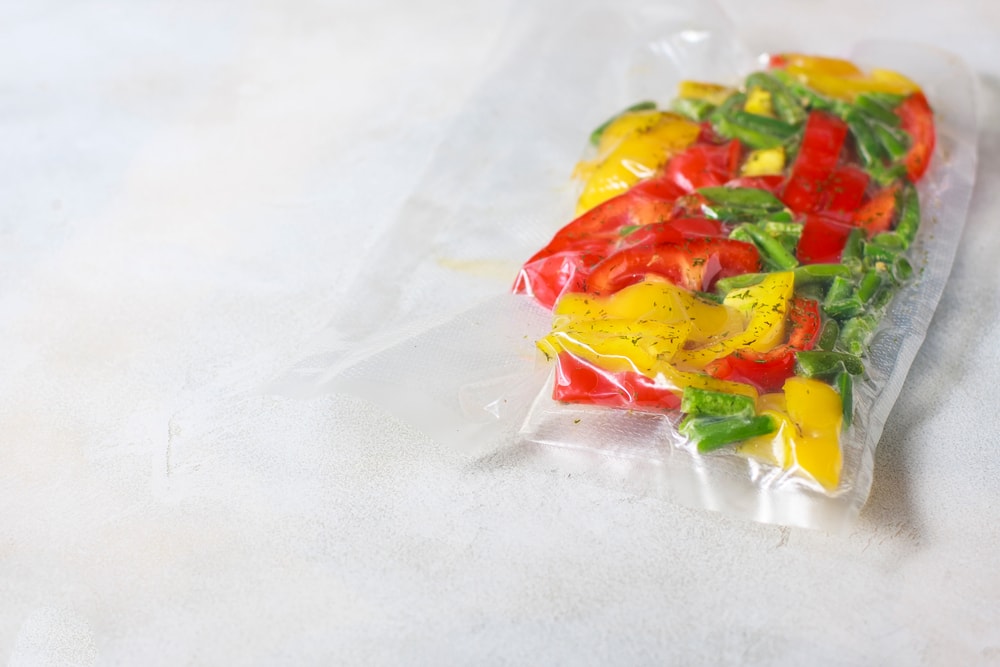
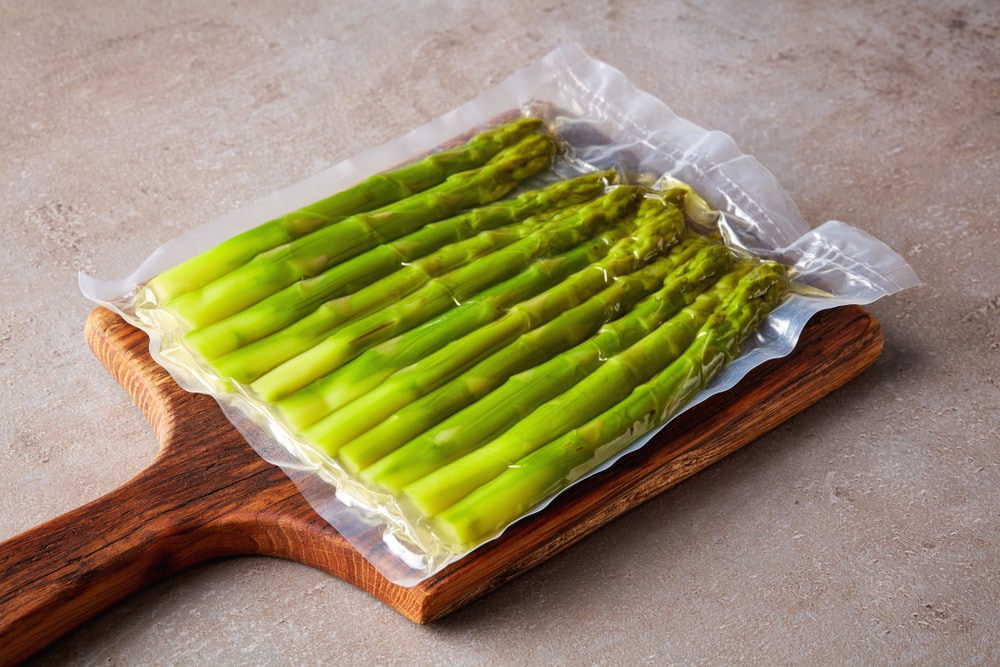
The first step to successfully vacuum packing your fresh produce is to ensure that you have prepped them correctly. Failure to plan is planning to fail – cliched but so incredibly true! When it comes to larger fruits and veggies, you’ll want to chop them into smaller bits before packaging. Now, the most common way to store veggies in such a manner is to pre-blanche them in boiling water, immediately shock them in an ice bath (to stop any further cooking) and then drain them well once they have fully cooled down. Blot off any excess water before placing into your vacuum bag and then sealing with your vacuum sealer. You can now pop your little packets of fresh veggies into the fridge or freezer, for an easy side to any meal, any day of the week.
Some of the benefits of prepping and storing your veggies as above mentioned is that you are ‘accidentally’ pasteurising them in the process, a process that will help you avoid that darn freezer burn that we so often encounter when we have something in the freezer for too long! Yuck! You can also cut down on your food waste by preparing and storing your veggies this way, as you’ll be able to greatly extend their shelf life by freezing them for a later date when you’d like to consume them. Aside from money saved with less wastage, you’ll also be saving yourself a tremendous amount of time when it comes to preparing food, which is an added bonus for those who lead hectic lives and are looking to spend as little time as possible in the kitchen after a tiring day. Can’t think of anything better, in my humble opinion!
 Prepping Your Fruit
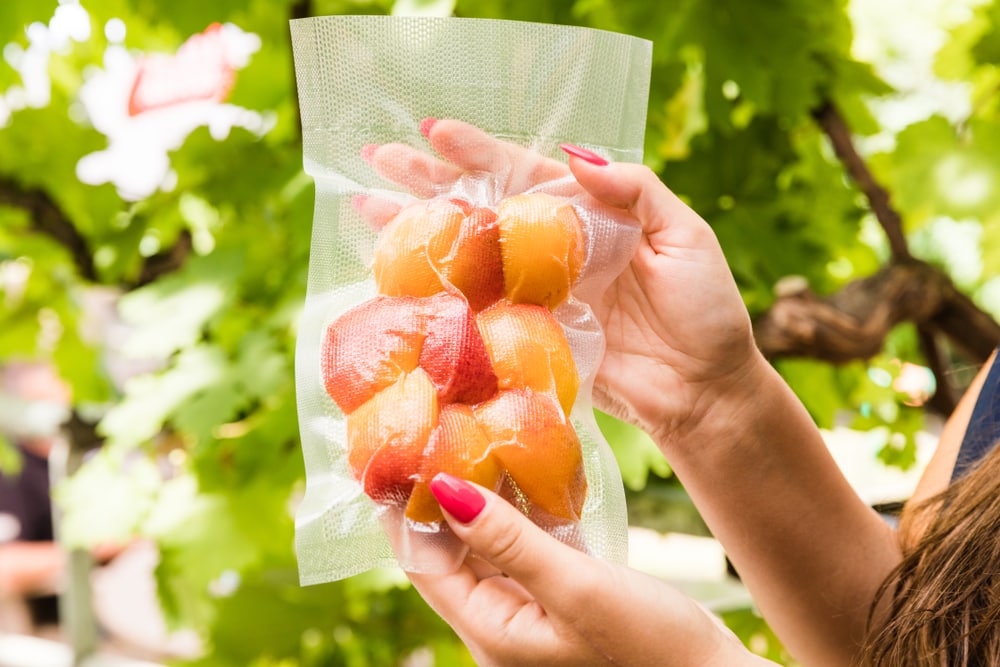
Now, when it comes to fruit, the preparation steps you’ll have to take obviously differ, unless for some reason you enjoy consuming blanched fruit (hey, who am I to judge?). When sealing your fruit, you’ll want to be mindful about some fruit such as berries and papayas etc which may be way too soft in their regular state to be vacuum sealed. For fruit that bruises easily, you’ll want to freeze them prior to vacuum sealing, so that you don’t end up crushing them and creating a vacuum packed smoothie by accident. You can simply wash your fruit, dry thoroughly, pre-freeze on a cookie sheet in the freezer and then proceed to vacuum seal. For sturdier fruit, you can skip the whole freezing bit and go straight to washing, drying and vacuum sealing.
Vacuum sealing is absolutely perfect for time-sensitive fruit such as Avocados (heard of the term ageing like an Avocado? You know that I’m talking about…) that go bad seemingly instantly. It has been proven that vacuum sealing helps you keep fruit such as Avocados fresh for 5 times longer than regular cling wrap will, which is something that makes me very happy!
Let’s Go To Flavour Town!
Vacuum sealing is great to extend the life of your produce, but it is also an amazing way to truly pack some flavour into your veggies. Vacuum sealing vegetables with a marinade is an amazing way to pack some punch into an otherwise bland canvas, and because no air is involved in the packaging, you’ll need to marinade your veggies for a lot less longer than usual. Vacuuming air out of the equation creates a lower overall pressure inside your vacuum bag which then acts like suction, and your marinade will permeate into your veggies a lot faster than it would during the normal process of osmosis. This saves you a heap of time, something you and I definitely could do with!
How Do I Reheat Vacuum Sealed Food?
Reheating Vacuum sealed food is truly a piece of cake. If you have used high quality bags, you can easily pop them into a pot of hot water until your food is nice and hot, remove the bag from the water carefully, snip it open and pop the contents of the bag straight out onto your plate. For those who aren’t looking to fiddle with a hot water bath, you can simply cut your vacuum bags open and empty contents into a pot/into the microwave and warm your food up as you usually would. Regardless of which option you utilise, you can be sure that you won’t be spending more than 10 minutes in the kitchen prepping your meal. I mean, we have better things to do than slave over the stove most days!